Images
While AppCUI is developed for CLI usage, it can still use images to some degree, meaning that it can store images as an array of pixels and it has various methods to represent them using characters and combinations of existing colors.
To create an image, use the class Image with the following construction methods:
Image::new(width,height)creates an image with a specific size. That image will be filled with a transparent pixel that you can later changeImage::from_str(...)creates a 16 color image based on a string representation.Image::from_buffer(buffer, size)creates an image from a buffer of pixel values encoded as u32 ARGB values.
Methods
Once an image is created you can use the following methods to manipulate it:
| Method | Purpose |
|---|---|
clear(...) | Fills the entire image with a specific pixel |
pixel(...) | Provides the pixel from a specific coordinate in the image or None otherwise |
set_pixel(...) | Sets the pixel from a specific coordinate in the image |
width() | The width of the image in pixels |
height() | The height of the image in pixels |
size() | The size (width and height) of the image in pixels |
render_size(render_options) | The size (in characters) needed for a surface object to allow the entire image to be painted. It requires a RenderOptions object to compute |
remove_alpha() | Removes the alpha channel from all pixels, making them fully opaque |
Pixel
A pixel is a simple structure defined as follows:
#[derive(Copy, Clone, Debug, PartialEq, Default)]
pub struct Pixel {
    pub red: u8,
    pub green: u8,
    pub blue: u8,
    pub alpha: u8,
}
You can create a pixel in the following way:
- using direct construction:
let px = Pixel { red:10, green: 20, blue:30, alpha: 255 }; - using the
.new(...)constructor:let px = Pixel::new(10, 20, 30, 255); - using the
.with_rgb(...)constructor:let px = Pixel::with_rgb(10, 20, 30); - using the
.with_color(...)constructor:let px = Pixel::with_color(Color::Aqua); - using the From implementation from an u32 (in an ARGB format -
AlphaRedGreenBlue).let px = Pixel::from(0xFF005090u32); - using the Default implementation (this will create a transparent pixel where
Red=0,Green=0,Blue=0andAlpha=0)let px = Pixel::default();
Usage
A typical way to create an image is as follows:
- create a new
Imageobject - optionally, fill the entire image with a different pixel than the default one
- use
.set_pixel(...)method to fill the image. At this point additional crates that can load an image from a file can be used to transfer the content of that image into this object.
The following example draws a horizontal Red line on a Blue background image of size 32x32:
let mut img = Image::new(32,32);
img.clear(Pixel::with_color(Color::Blue));
for i in 5..30 {
    img.set_pixel(i,10,Pixel::with_color(Color::Red));
}
Building from a string
A more common usage is to build a small image from a string that specifies colors for each pixel. The format in this case is as follows:
- each line is enclosed between two characters
| - outside of these characters any other character is being ignored (usually you add spaces or new lines to align the text)
- each line must have the same width (in terms of the number of characters that are located between
|characters )
for example, a 5x5 image will be represented as follows:
let string_representation = r#"
      |.....|
      |.....|
      |.....|
      |.....|
      |.....|
"#;
Within the space between the characters | the following characters have a color association:
| Character | Enum variant | RGB | Color |
|---|---|---|---|
0 (space).(point) | Color::Black | Red=0, Green=0, Blue=0 | |
1B(capital B) | Color::DarkBlue | Red=0, Green=0, Blue=128 | |
2G(capital G) | Color::DarkGreen | Red=0, Green=128, Blue=0 | |
3T(capital T) | Color::Teal | Red=0, Green=128, Blue=128 | |
4R(capital R) | Color::DarkRed | Red=128, Green=0, Blue=0 | |
5M or m | Color::Magenta | Red=128, Green=0, Blue=128 | |
6O or o | Color::Olive | Red=128, Green=128, Blue=0 | |
7S(capital S) | Color::Silver | Red=192, Green=192, Blue=192 | |
8s(lower s) | Color::Gray | Red=128, Green=128, Blue=128 | |
9b(lower b) | Color::Blue | Red=0, Green=0, Blue=255 | |
g(lower g) | Color::Green | Red=0, Green=255, Blue=0 | |
r(lower r) | Color::Red | Red=255, Green=0, Blue=0 | |
A or at(lower t) | Color::Aqua | Red=0, Green=255, Blue=255 | |
P or p | Color::Pink | Red=255, Green=0, Blue=255 | |
Y or y | Color::Yellow | Red=255, Green=255, Blue=0 | |
W or w | Color::White | Red=255, Green=255, Blue=255 |
So ... to create an image of a red heart ♥ you will need to create the following string:
let heart = r#"
    |..rr.rr..|
    |.rrrrrrr.|
    |.rrrrrrr.|
    |..rrrrr..|
    |...rrr...|
    |....r....|
"#;
let img = Image::from_str(heart);
Rendering images
AppCUI framework relies on characters. As such, an image cannot be displayed as it is. However, there is one method in the Surface object that can be used to approximate an image:
impl Surface {
    // other methods
    pub fn draw_image(&mut self, x: i32,
                                y: i32,
                                image: &Image,
                                render_options: &image::RenderOptions
                    ) { ... }
}
This method attempts to draw an image using characters and the available colors. The RenderOptions object controls how the image is rendered and can be created using the builder pattern:
RenderOptionsBuilder Methods
The RenderOptionsBuilder provides a fluent interface for configuring render options. All methods return Self for method chaining:
| Method | Parameter Type | Default | Purpose |
|---|---|---|---|
new() | - | - | Creates a new builder with default settings |
scale(scale) | Scale | NoScale | Sets the scaling factor for the image |
character_set(char_set) | CharacterSet | SmallBlocks | Sets the character set for rendering |
color_schema(schema) | ColorSchema | Auto | Sets the color schema for rendering |
luminance_threshold(value) | f64 | 0.5 | Sets the luminance threshold (0.0-1.0) for black/white conversion |
build() | - | - | Finalizes the builder and returns a RenderOptions object |
Example:
let render_options = image::RenderOptionsBuilder::new()
    .scale(image::Scale::Scale50)
    .character_set(image::CharacterSet::AsciiArt)
    .color_schema(image::ColorSchema::Color16)
    .luminance_threshold(0.3)
    .build();
The following rendering options are available:
Character Sets
SmallBlocks- Uses small block characters (default)LargeBlocks- Uses large block charactersDitheredShades- Uses dithered shadingBraille- Uses braille charactersAsciiArt- Uses ASCII art characters
Color Schemas
Auto- Automatic color detection (default)Color16- 16-color modeTrueColors- True color mode (if feature enabled)GrayScale4- 4-level grayscaleGrayScaleTrueColors- True color grayscale (if feature enabled)BlackAndWhite- Black and white mode
Scaling Options
Scale::NoScale=> 100%Scale::Scale50=> 50%Scale::Scale33=> 33%Scale::Scale25=> 25%Scale::Scale20=> 20%Scale::Scale10=> 10%Scale::Scale5=> 5%
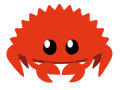
Let's consider an image of Cuddly Ferris and see how it will be displayed using different rendering methods:
| Methods | Result |
|---|---|
| SmallBlocks | 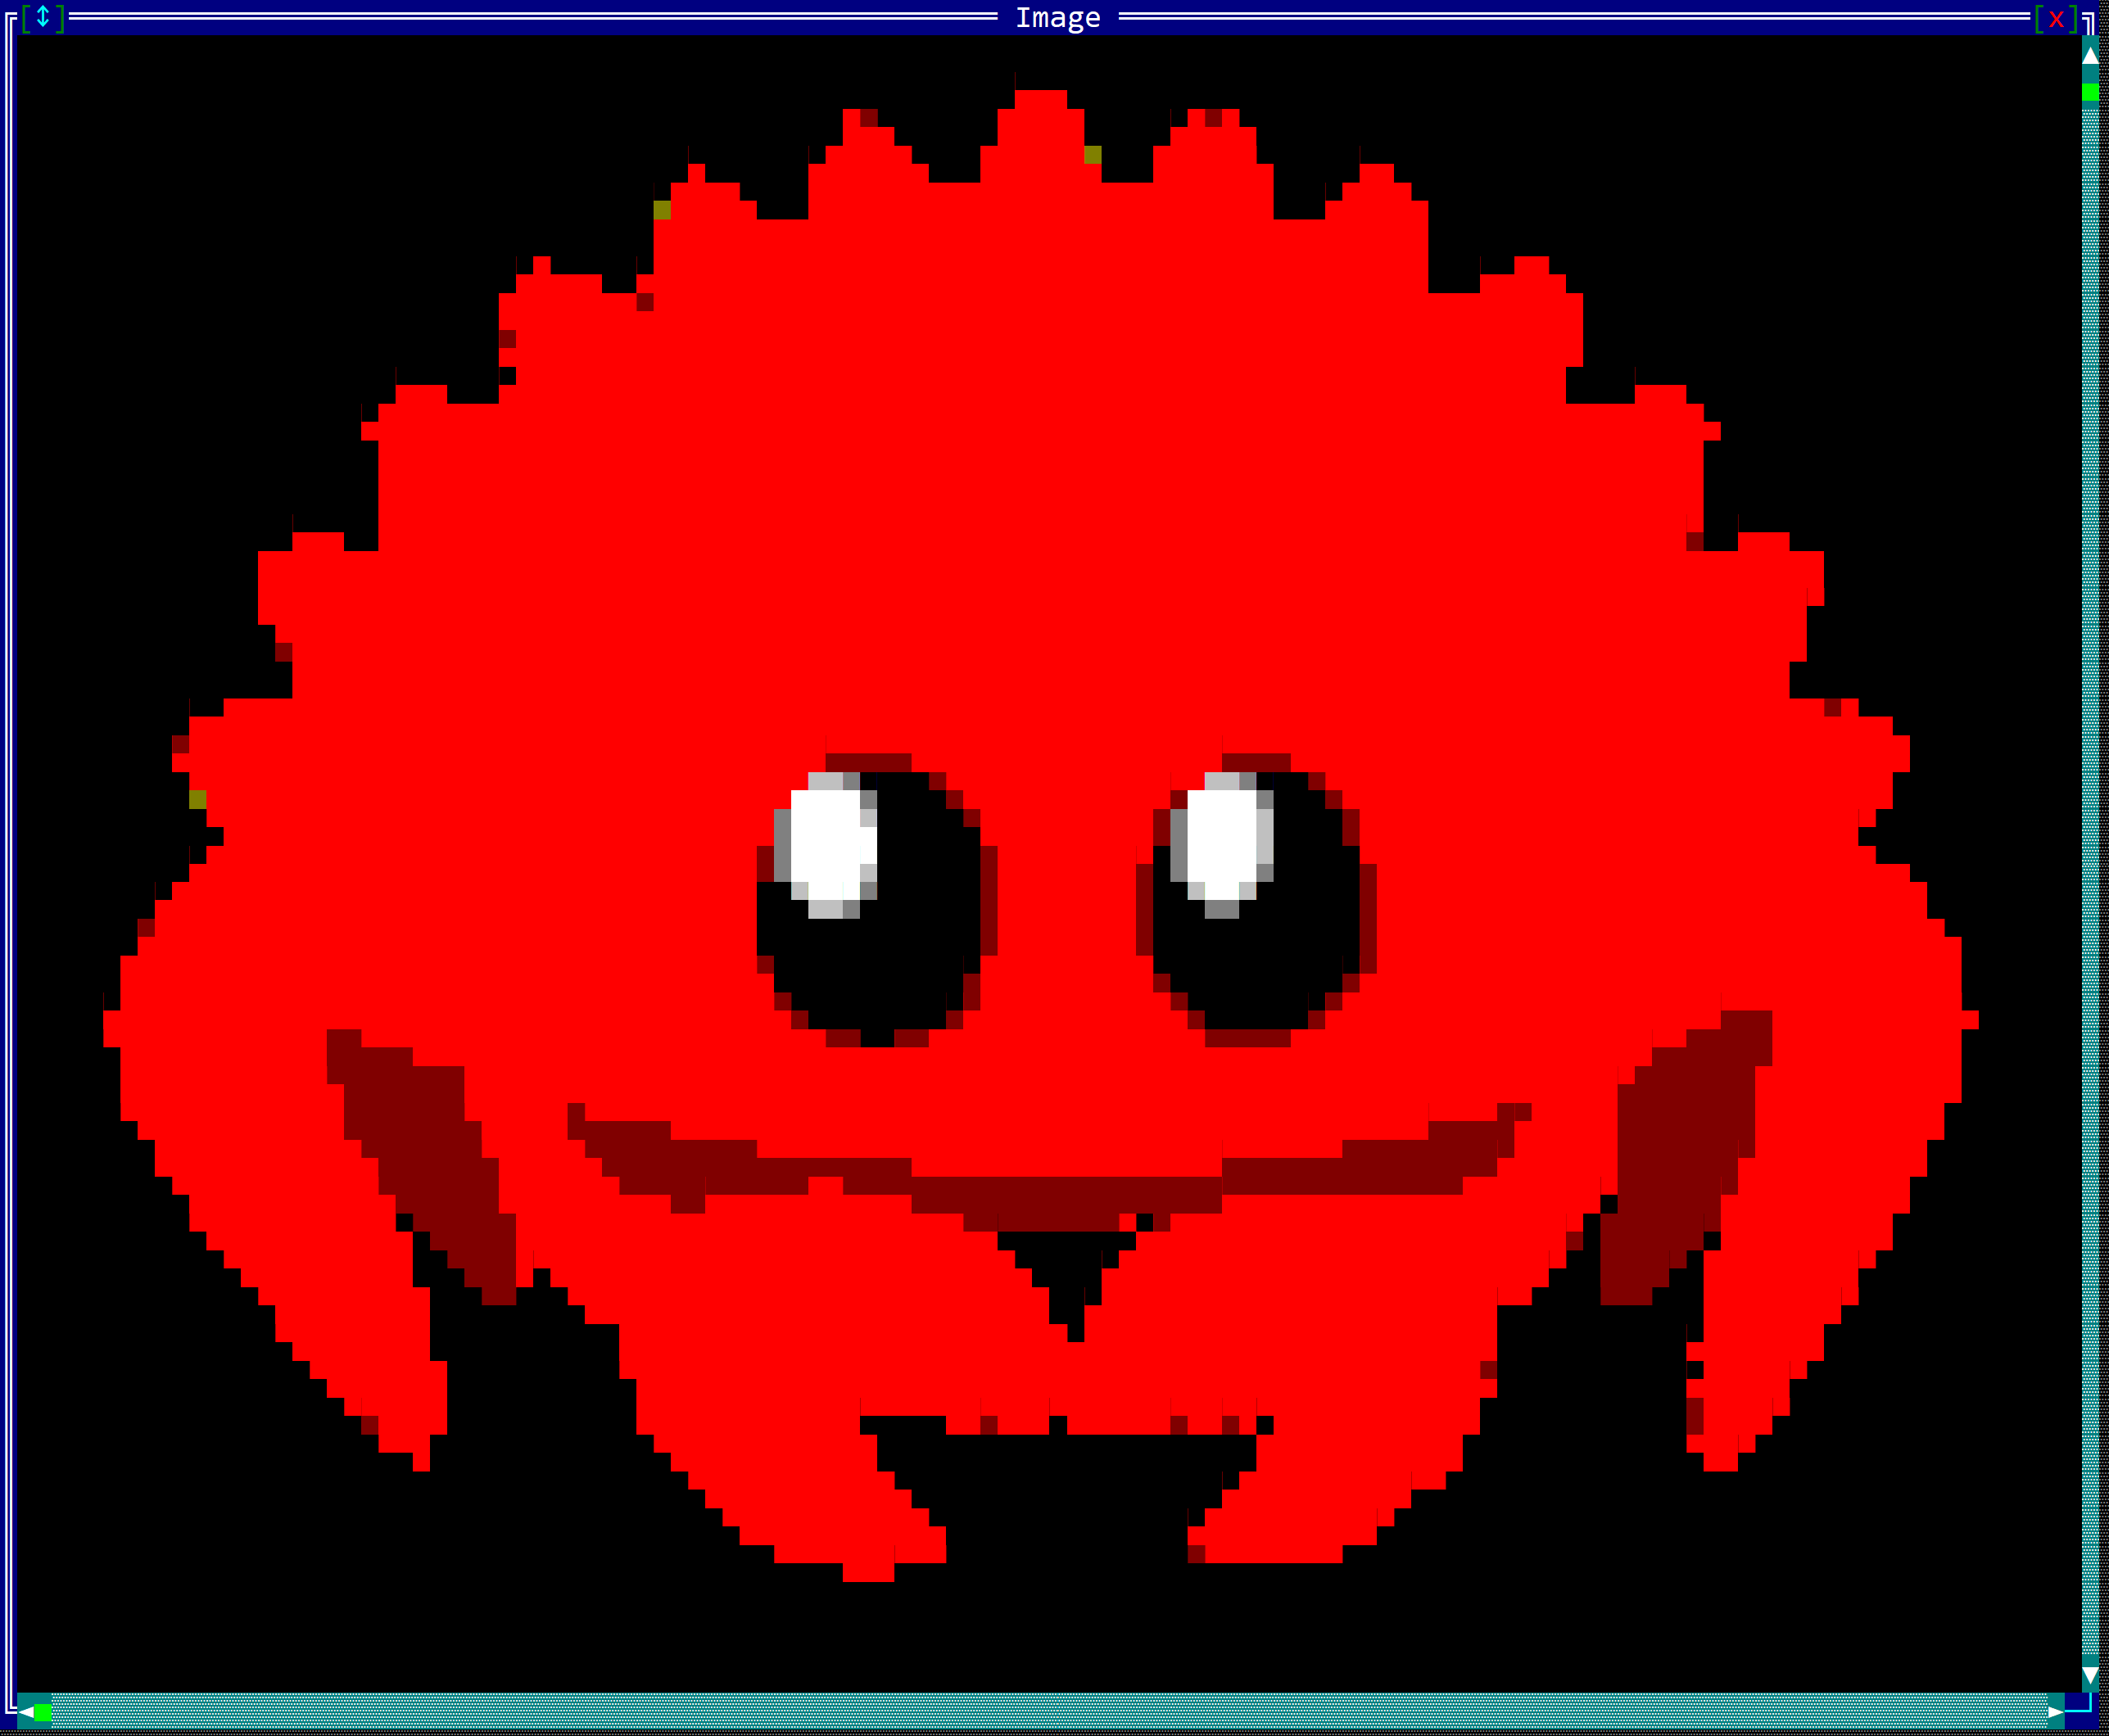 |
| LargeBlocks |  |
| DitheredShades | 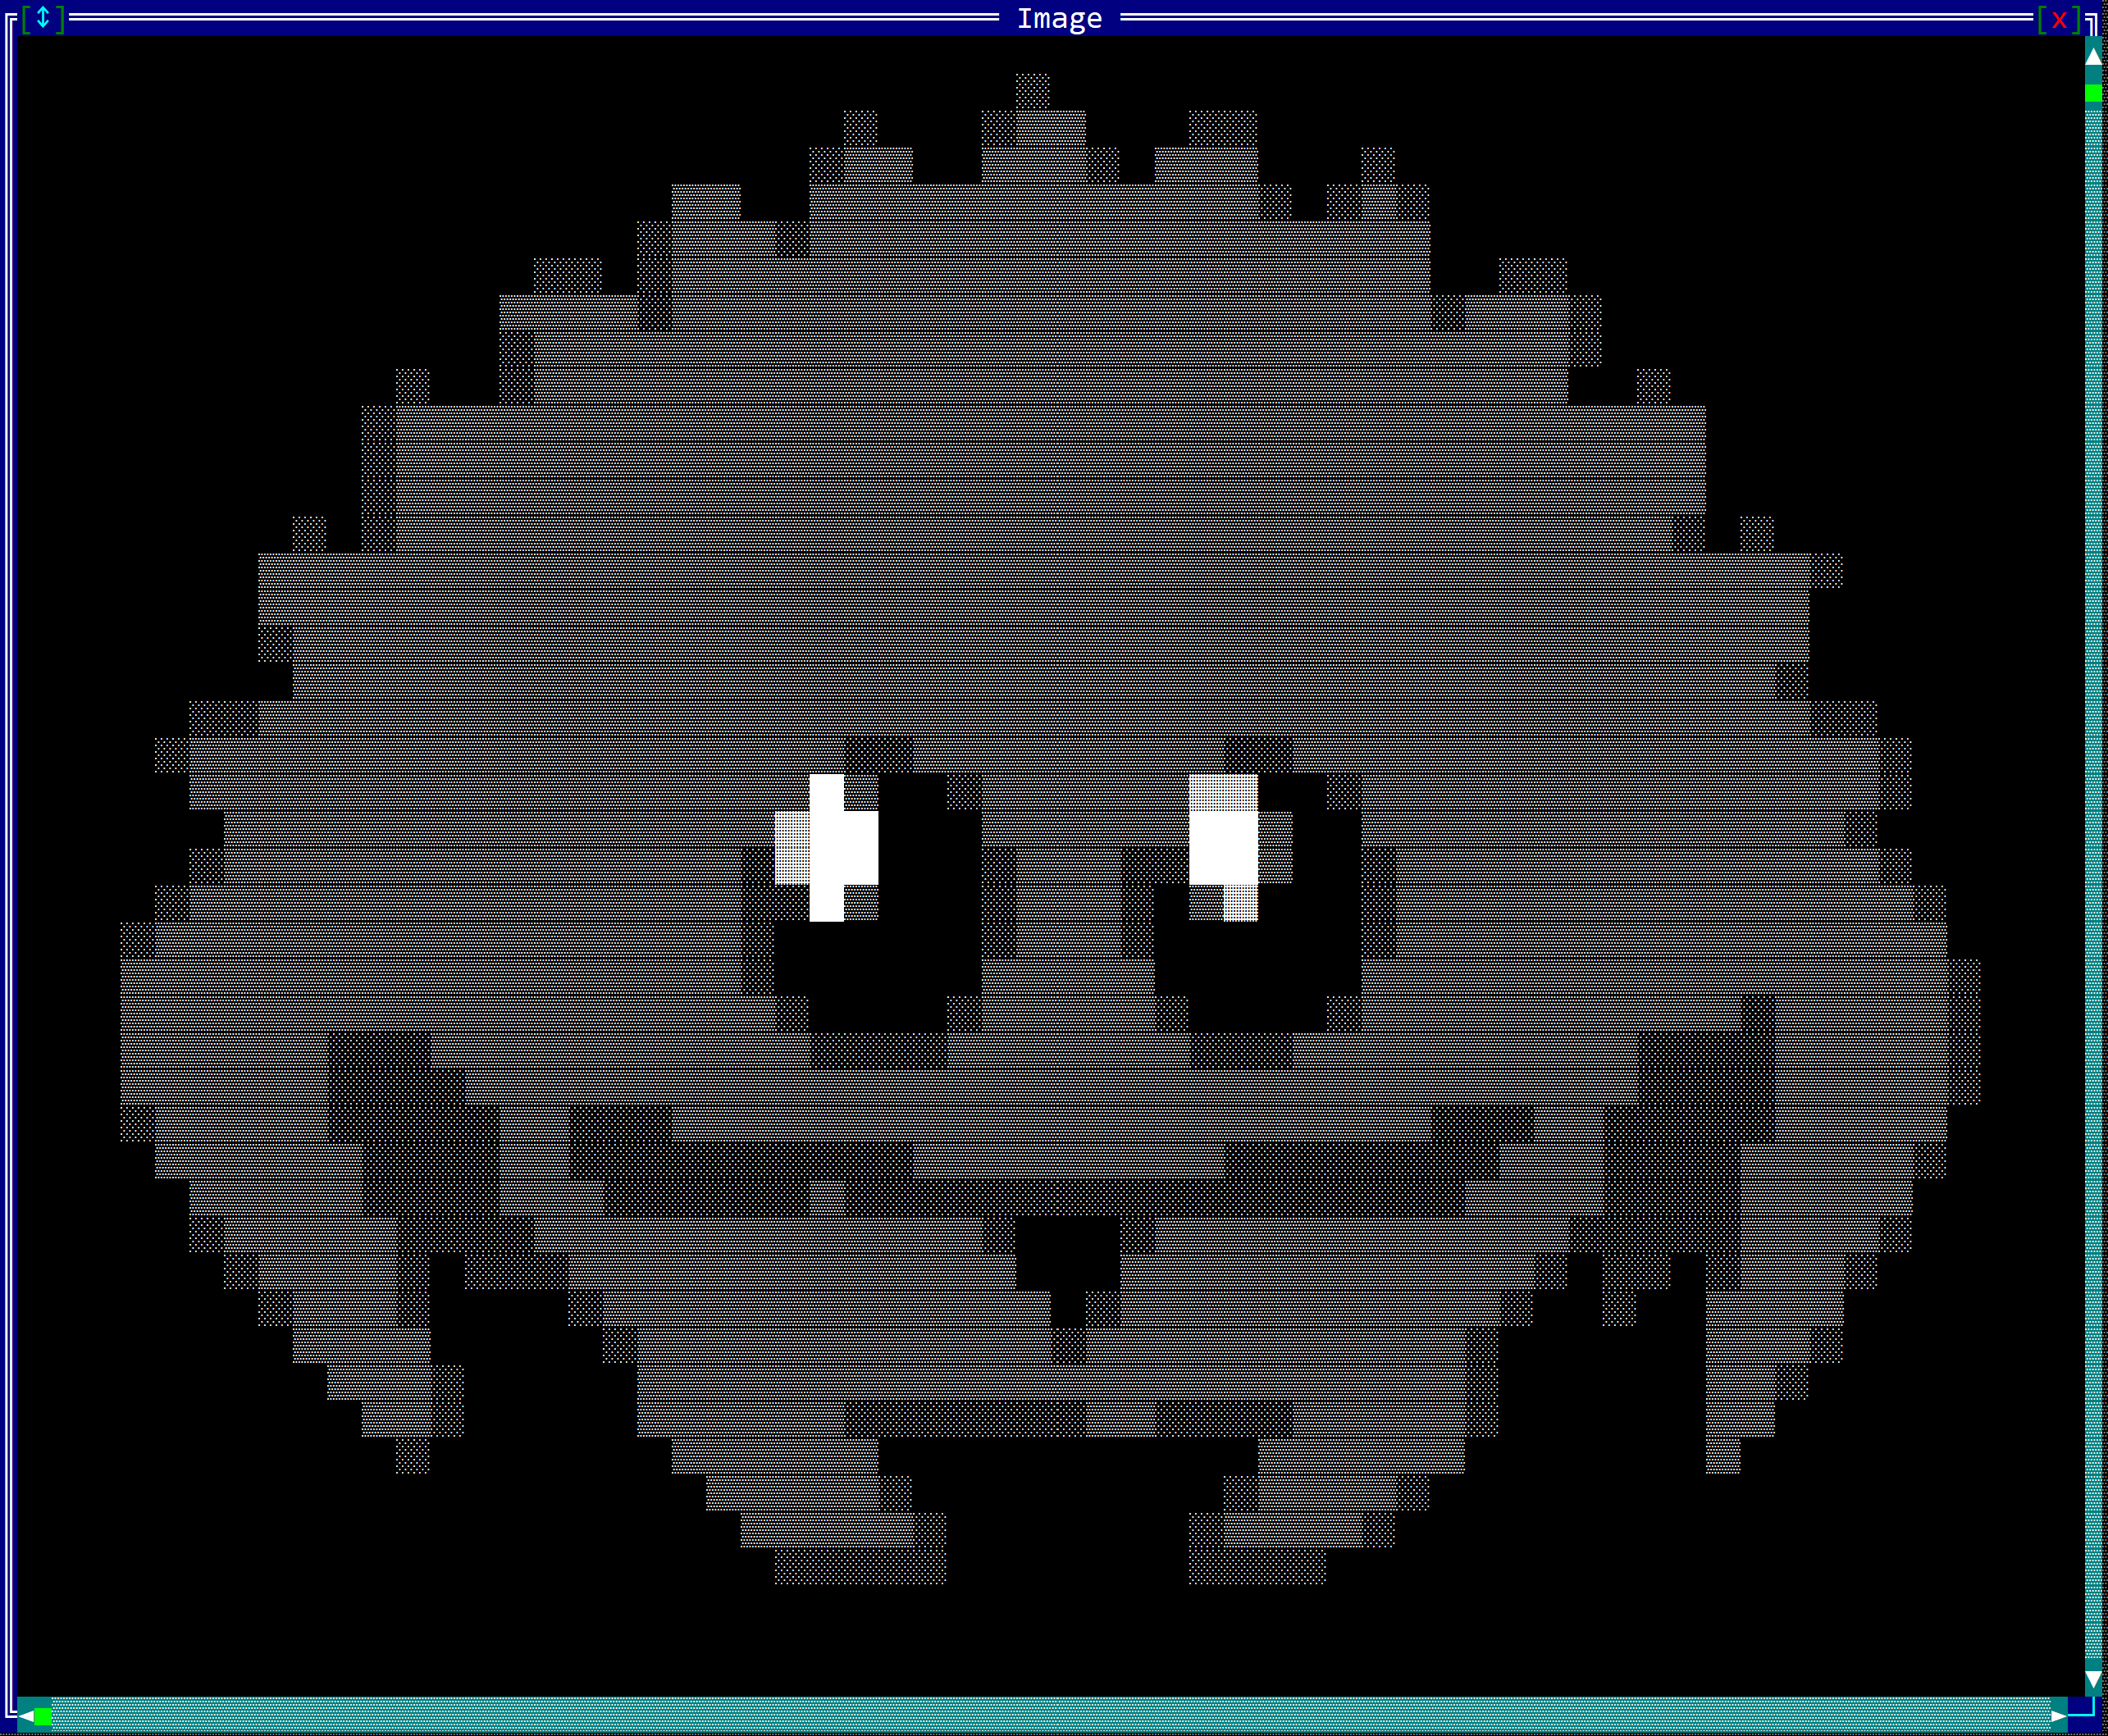 |
| AsciiArt | 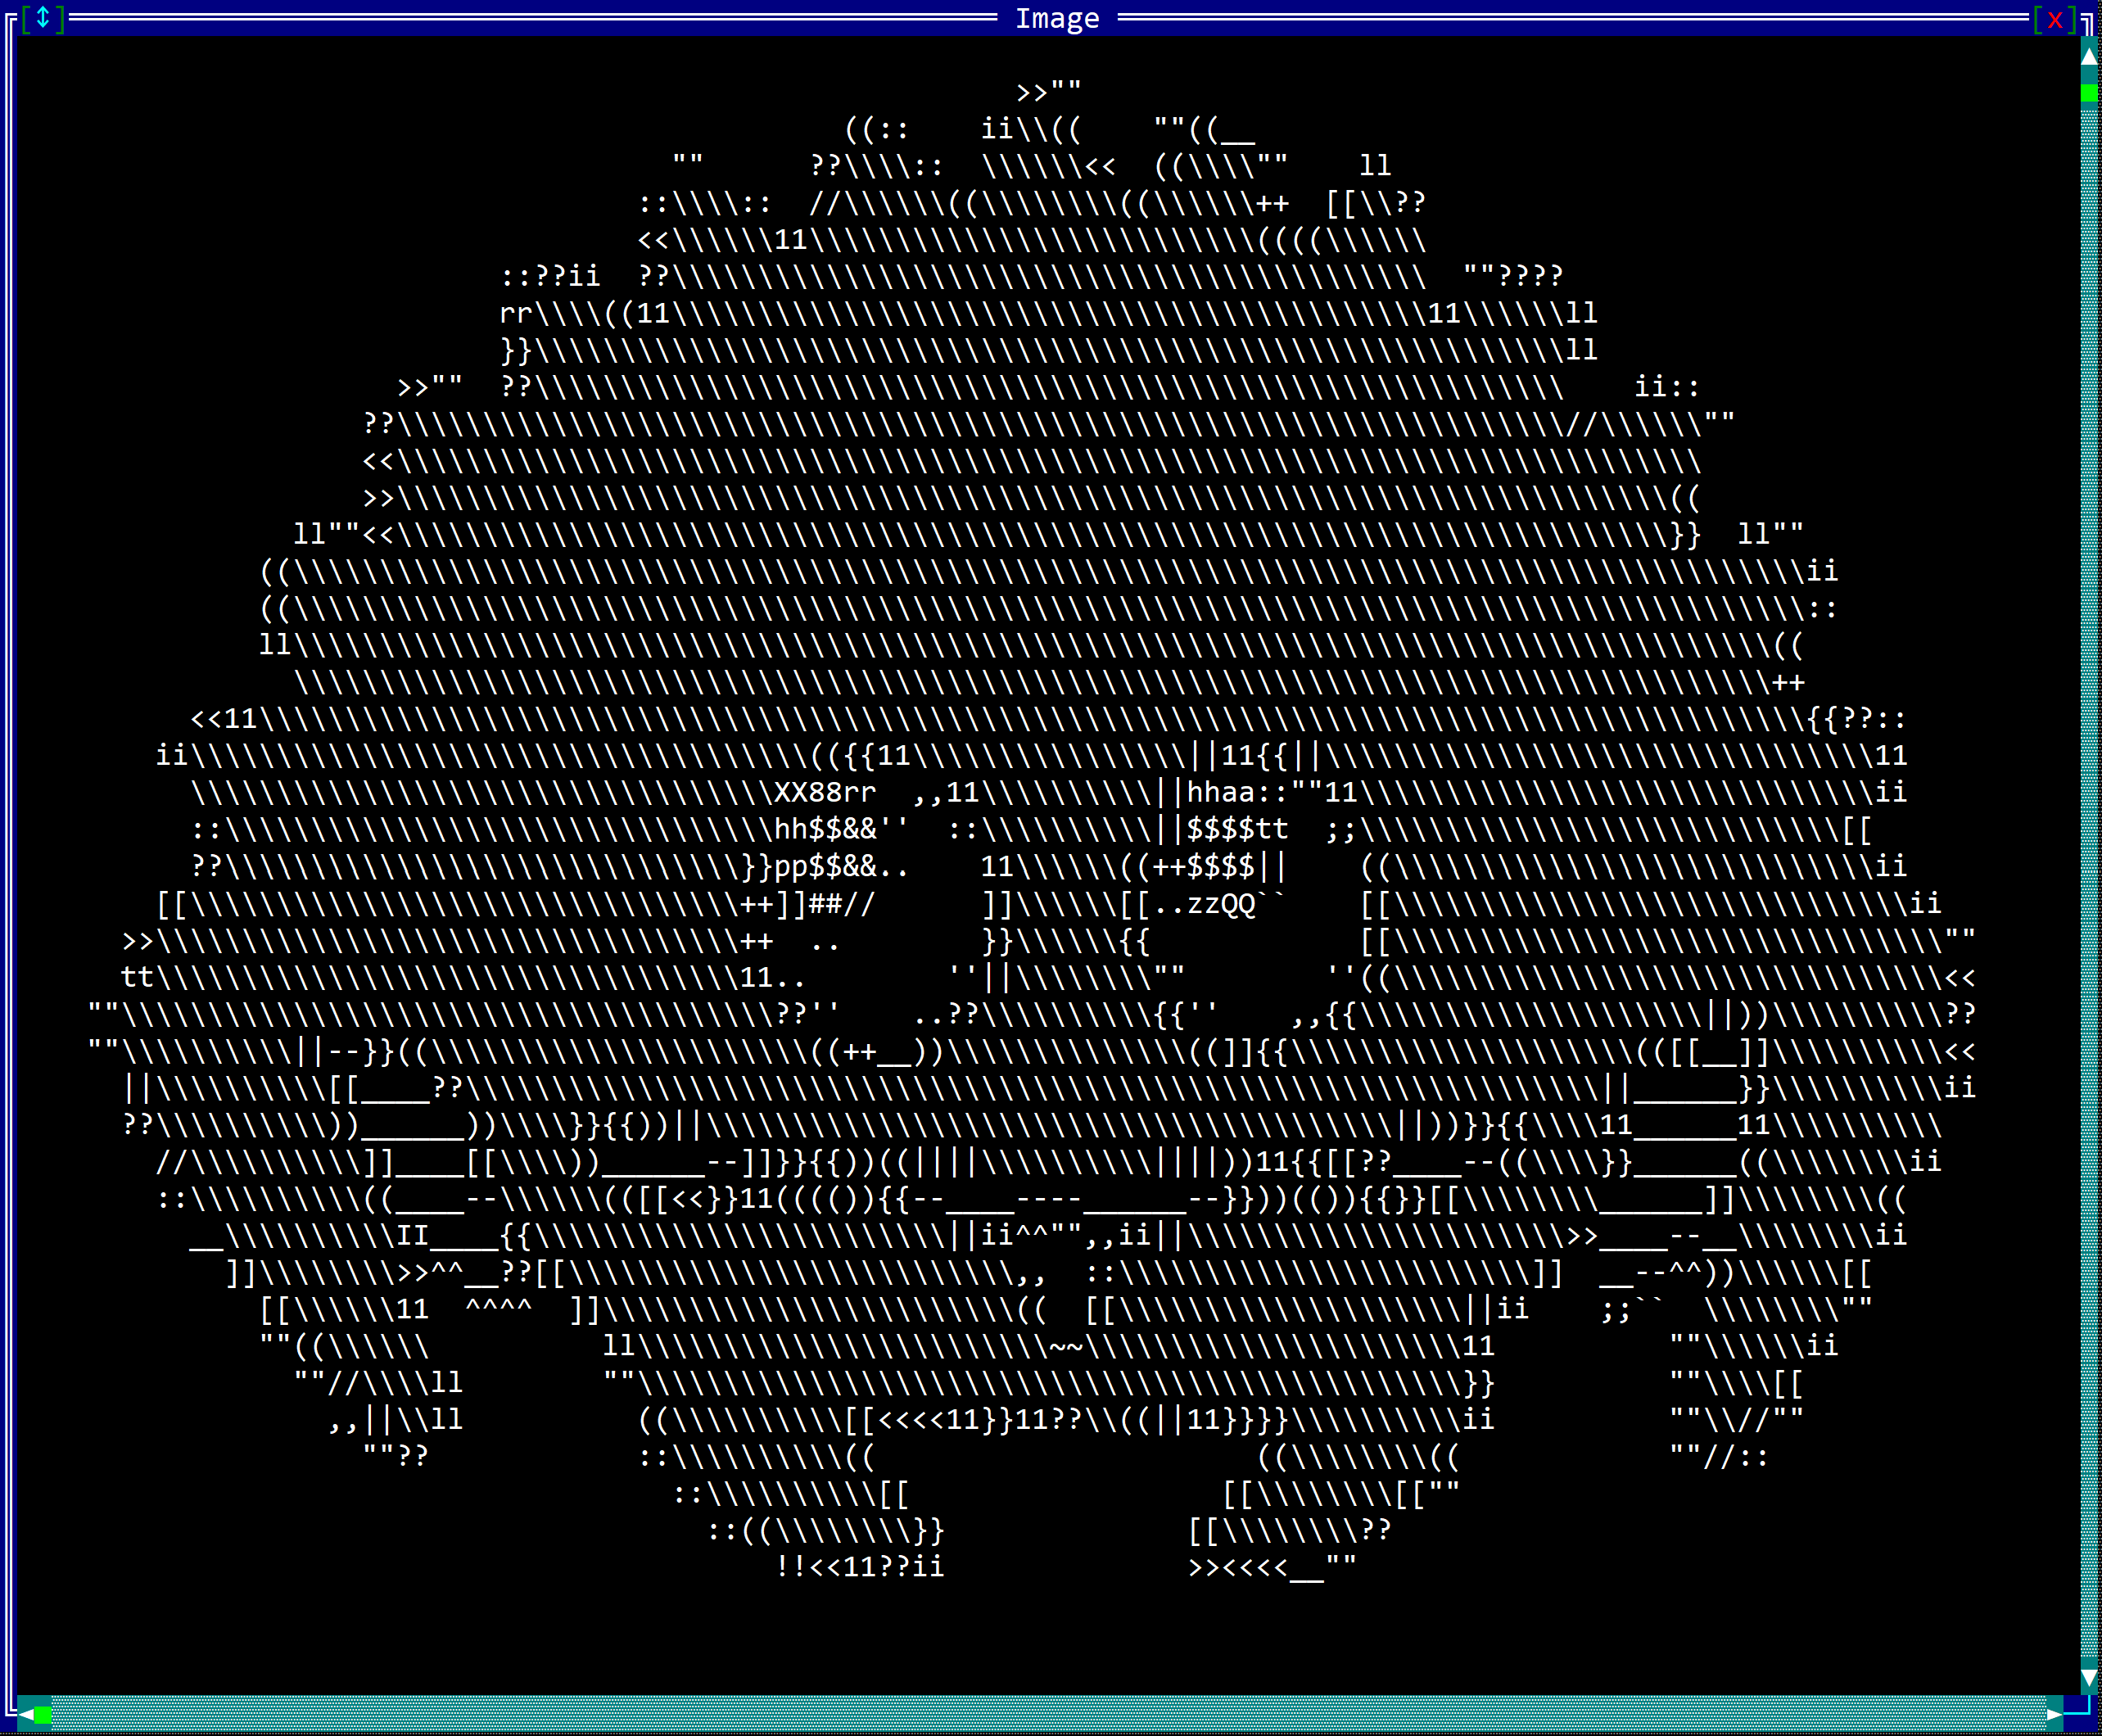 |